Prior to configuring this interface, ensure that the following pre-requisites have been met:
Once the above pre-requisites have been completed, the steps outlined below can be completed to configure and use the SevenRooms Interface with Idealpos.
In Idealpos, go to: Back Office > Setup > Licence Gateway > Ensure that SevenRooms appears in the Options column.
If required, press the "Reload" button at the bottom of the Licence Gateway window to retrieve the current Licence options.
If the SevenRooms module does not appear after pressing "Reload", contact Idealpos or your Idealpos Reseller.
Go to: Back Office > Setup > Global Options > Restaurant > User-Defined Table Status Buttons.
The User-Defined Table Status Buttons must match the In-Service Statuses that are configured in SevenRooms.
New Instruction Items may need to be created as required (Back Office > File > Stock Control > Stock Items > Add > Ensure that the Instruction checkbox is enabled and ensure that the Instruction Stock Item is configured to print to the correct Kitchen Printer(s)).
To configure the Course Descriptions in SevenRooms, login to https://www.sevenrooms.com/login > Select "Settings" on the bottom-left corner of the page > Select "Reservation Statuses" > In-Service Statuses > Modify In-Service Statuses as required.
It is also recommended that the Session times in Idealpos align with the Shifts in SevenRooms.
Contact SevenRooms for assistance with configuring Shift times in SevenRooms.
Note!
After configuring or changing the User-Defined Table Status Button Captions, an Idealpos Close Suite/Open Suite may be required for the updated Descriptions to appear in the Interfaces tab (outlined in the next step below).
Go to: Back Office > Setup > Global Options > Interfaces > Reservations.
The Tables in the Idealpos Restaurant Table Map must match the Tables in SevenRooms.
This is essential so that when customers are seated to a table in SevenRooms, the corresponding table in the Idealpos Restaurant Table Map will also be updated to show that it is occupied by the customer.
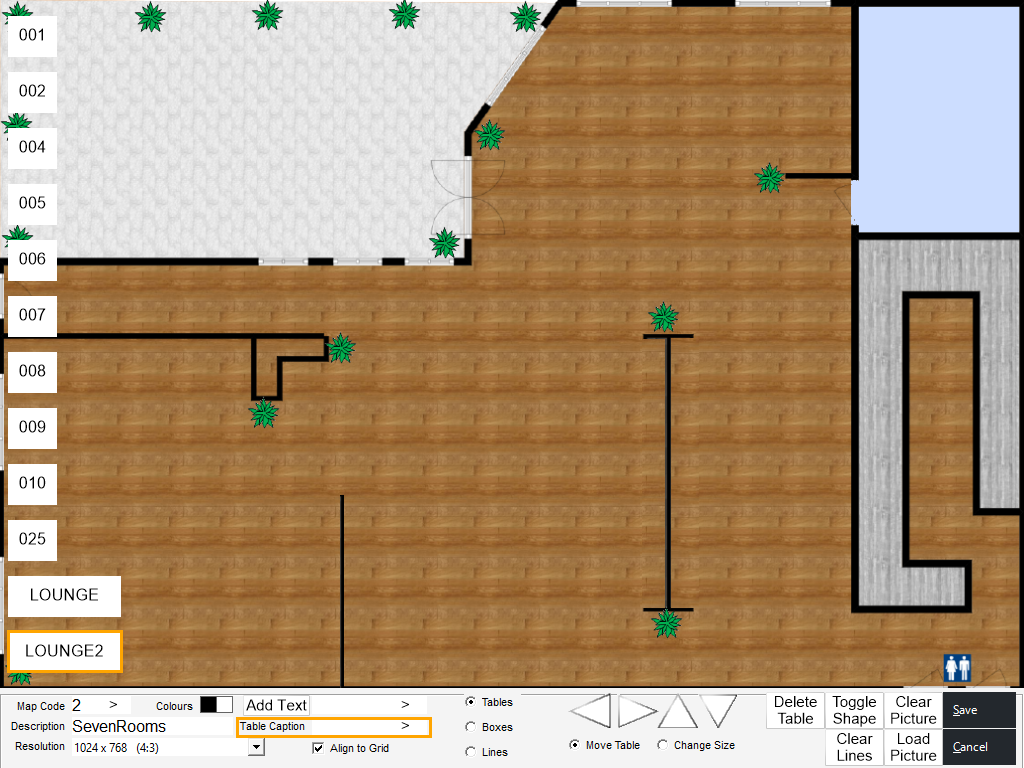
Go to: Idealpos Back Office > Setup > Restaurant > Table Maps > Select a Table Map > Modify.
The Table Numbers shown in the Idealpos Table Map must match the Table Numbers in the SevenRooms configuration.
In Idealpos, configure the Table Numbers/Descriptions by entering the Table Number shown in the SevenRooms "Table No." column into the Table Caption field, then press the Table in the Table Map that will utilise the entered Table Caption.
E.g. To name a Table as LOUNGE2, enter LOUNGE2 into the Table Caption field, then press on a Table in the Table Map; the table that is pressed will have the entered Table Caption assigned to the table.
If a Table Caption needs to be cleared, right-click on a Table in the Table Map and select "Remove Alias" from the menu. This is only possible from the Modify Table Map via Back Office > Setup > Restaurant > Table Maps > Select a Table Map > Modify.
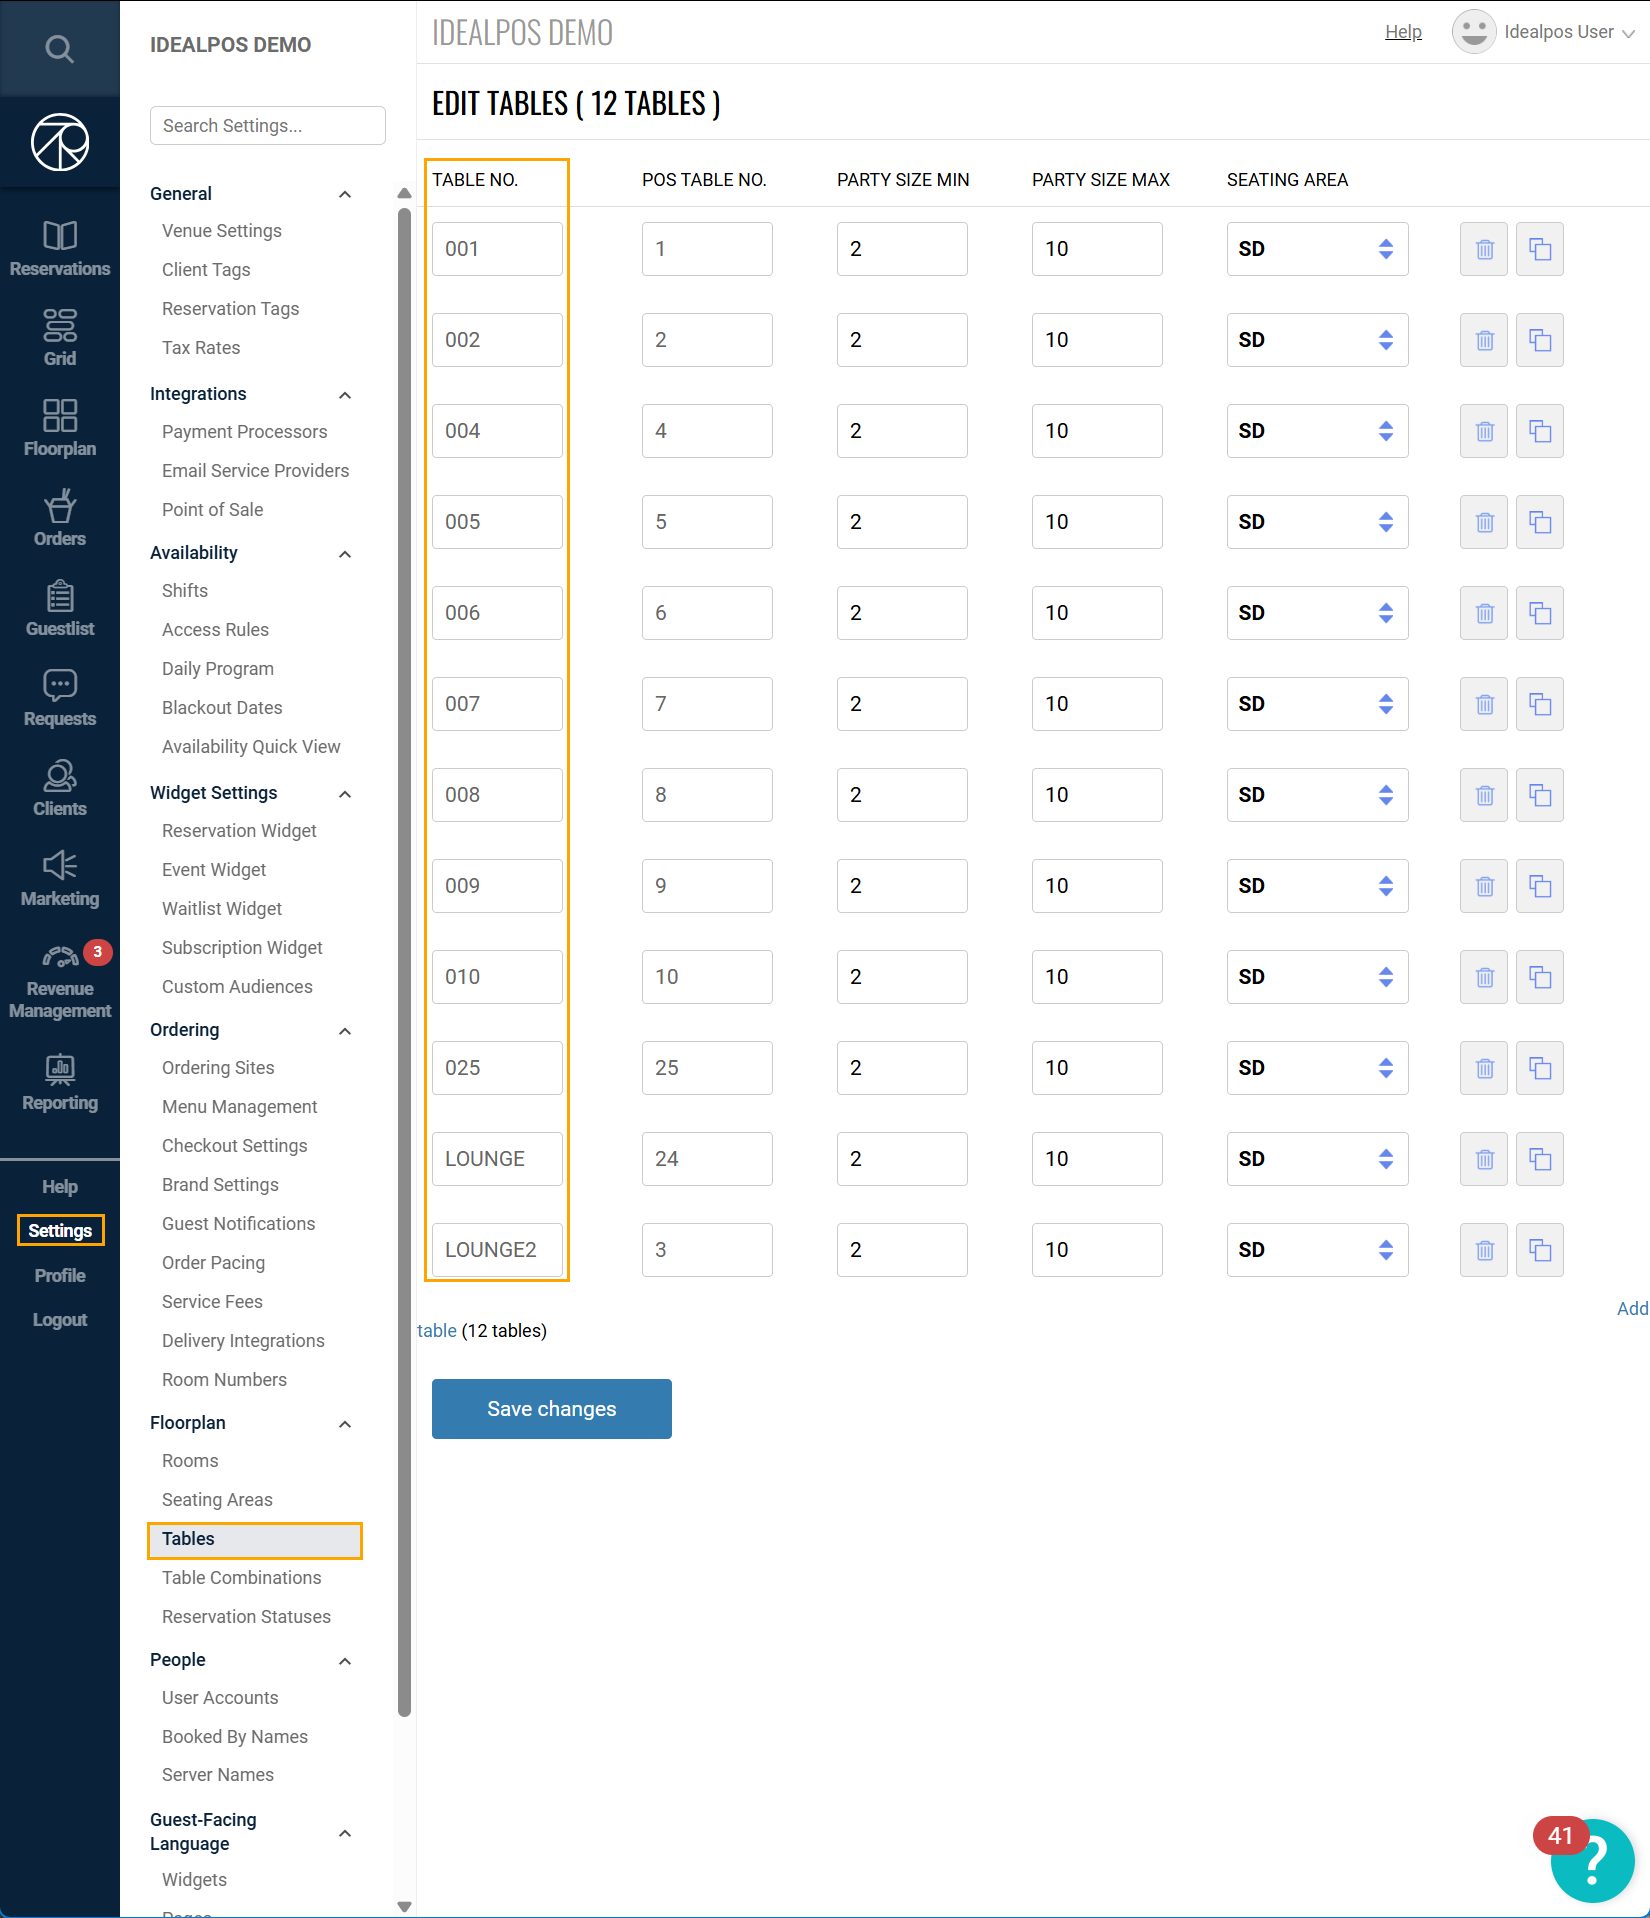
Repeat the process to assign a name for each Table shown in the SevenRooms Tables page (example of the SevenRooms Tables page is shown further below)
The Table Numbers in SevenRooms can be accessed by going to the SevenRooms website (https://sevenrooms.com) > Login > Go to Settings > Floorplan > Tables.
The SevenRooms Interface has now been configured.
To apply the changes, it is recommended to perform a Close Suite/Open Suite on all POS Terminals for the changes to take effect.
After restarting Idealpos on each POS Terminal and Back Office, the SevenRooms Interface is ready for use.
Refer to the page Using SevenRooms Interface with Idealpos for information about using this interface.